The Ultimate Guide to Brined Buffalo Wings
The Ultimate Guide to Brined Buffalo Wings are an American classic that have found their way onto menus and into home kitchens worldwide. But what separates truly exceptional wings from the mediocre? The secret lies in brining—a simple technique that transforms ordinary chicken wings The Ultimate Guide to Brined Buffalo Wings : juicy, flavorful morsels with perfectly crispy skin. In this comprehensive guide, AI Chef will walk you through the art of brining buffalo wings, from preparation to serving, with expert tips to elevate your wing game.

Why Brining Makes a Difference
Before diving into the recipe, let’s understand why brining works wonders. The salt solution penetrates the meat, seasoning it throughout while helping the proteins retain moisture during cooking. The sugar balances the saltiness and promotes browning, while aromatics infuse subtle flavors that complement—rather than compete with—the signature buffalo sauce
The Perfect & The Ultimate Guide to Brined Buffalo Wings
Ingredients for the Brine:
- 5 garlic cloves, smashed and peeled
- 1 medium lemon, juiced (keep the juiced lemon)
- 10 cups cold water, divided
- 1/3 cup kosher salt
- 1/4 cup granulated sugar
- 4 dried bay leaves
- 1 tablespoon whole black peppercorns
- 2 1/2 pounds party chicken wings, separated into drumettes and flats

Step 1: Prepare the Brine Solution
In a large pot, combine the smashed garlic cloves, fresh lemon juice, and the juiced lemon half. Add 5 cups of cold water, kosher salt, granulated sugar, bay leaves, and black peppercorns. This aromatic base creates layers of flavor that will penetrate the wings.
Bring the mixture to a low simmer over medium heat, stirring occasionally to ensure the salt and sugar fully dissolve. Once dissolved, turn off the heat immediately—we don’t want to cook the brine! Add the remaining 5 cups of cold water to cool the mixture down quickly.
Allow the brine to cool completely to room temperature, which takes about 1 hour and 15 minutes. Using hot brine would partially cook the wings and potentially create food safety issues.
Step 2: Submerge and Infuse
Once the brine has cooled, add your chicken wings, making sure they’re completely submerged in the liquid. The wings should already be separated into drumettes and flats to ensure even brining.
Stir gently to ensure all surfaces of the wings come in contact with the brine. Cover the container and refrigerate for 12-16 hours. This timeframe is crucial—less than 12 hours won’t allow enough flavor penetration, while more than 16 hours can make the wings too salty and affect their texture.
The Critical Drying Phase
Step 3: Rinse and Air Dry
After brining, proper drying is essential for achieving that coveted crispy skin. Start by draining the wings in a colander and thoroughly rinsing them under cold water to remove excess salt and any aromatics clinging to the surface. Discard the used lemon, garlic, bay leaves, and peppercorns.
Set up a wire rack on a rimmed baking sheet—this allows air to circulate around the wings completely. Arrange the wings in a single layer, then thoroughly pat them dry with paper towels. Be meticulous here, as excess moisture is the enemy of crispiness.
The next step is crucial but often overlooked: refrigerate the wings, uncovered, for 2-3 hours. This creates the perfect dry surface that will transform into crispy skin during baking. The cold air in the refrigerator acts as a dehydrator, removing surface moisture while the skin forms a pellicle—a thin, tacky layer that will crisp up beautifully.
The Baking Method
Step 4: Perfectly Baked Wings
Position a rack in the top third of your oven and preheat to 400°F. This position maximizes heat circulation and browning.
Place your baking sheet with the dried wings on the top rack and bake until the skin turns an even golden brown. The wings should reach an internal temperature of at least 165°F for food safety, which typically takes 35-40 minutes. The rendered fat collecting in the baking sheet is a good sign that the wings are cooking properly.
No need to flip the wings—the elevated rack ensures even cooking and browning on all sides.
The Classic Buffalo Sauce
Step 5: Prepare the Signature Sauce
While the wings are baking, prepare the buffalo sauce. In a small saucepan, combine 3/4 cup of Frank’s Original RedHot Sauce (the traditional choice for authentic buffalo wings) with 3 tablespoons of unsalted butter.
Heat over medium until the butter completely melts and incorporates into the sauce. The butter creates the perfect balance of spice, acidity, and richness. Taste and adjust with freshly ground black pepper and a pinch of kosher salt if needed, though the wings themselves will provide plenty of seasoning.

Step 6: The Perfect Coating Technique
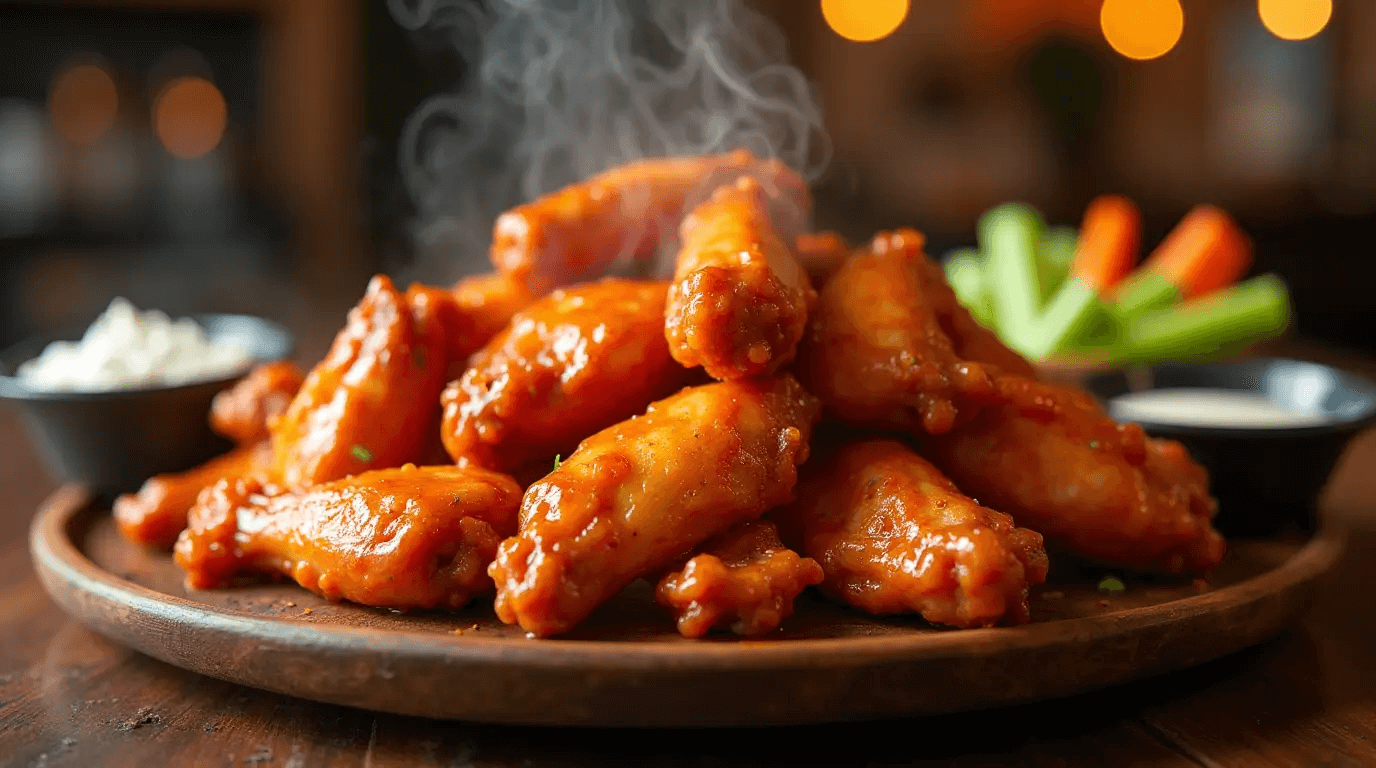
Transfer the freshly baked wings to a large bowl while they’re still hot. Pour the warm sauce over the wings and toss gently but thoroughly until every wing is evenly coated with that vibrant orange glaze.
The hot wings will absorb some of the sauce, creating an intense flavor bond that casual wing spots can’t match.
Serving Suggestions
Perfect Pairings for Your Buffalo Wings
Traditional accompaniments include:
- Cool, creamy ranch dressing
- Chunky blue cheese dip with visible cheese crumbles
- Tangy cowboy dressing for a Western twist
- Alabama white sauce for a Southern-inspired variation
- Parmesan peppercorn dressing for an Italian-American fusion
For the ultimate game day spread, serve alongside:
- Pigs in a blanket
- Easy beef nachos with melted cheese
- Ham and cheese sliders on soft Hawaiian rolls
- Bacon-wrapped jalapeño poppers
- Baked pepper jelly cream cheese dip with crackers
Expert Tips for Wing Perfection
- Quality matters: Start with fresh, not frozen, wings whenever possible for the best texture.
- Patience pays off: Don’t rush the brining or drying processes—they’re what separate good wings from great ones.
- Temperature control: Make sure your wings are completely room temperature before baking for even cooking.
- Sauce strategy: Keep your buffalo sauce warm but not hot when tossing—this helps it adhere perfectly without making the wings soggy.
- Serve immediately: Buffalo wings are at their peak within minutes of saucing—plan accordingly!
The Wing Master’s Final Thoughts
Brining transforms ordinary wings into a restaurant-quality experience, with meat that’s juicy and flavorful all the way through and skin that shatters with each bite. The technique requires minimal additional ingredients but delivers maximum impact. Once you’ve mastered brined buffalo wings, you’ll never go back to the basic version again.
With AI Chef guiding you, every batch of wings you make will be a masterpiece. Whether you’re hosting a game day gathering, planning a casual dinner, or just craving the perfect wing experience, this method delivers consistent, impressive results that will have everyone asking for your secret. And now you know—it’s all in the brine!
Have you tried our recipe? Share your review!
i tried this recipe and its yummy
These brined Buffalo wings are a game-changer! The brining makes them extra juicy and flavorful, and the crispy texture is just perfect. The sauce has the right balance of heat and tanginess. Best wings I’ve ever made—highly recommend!